For my first pair of jeans I’ve chosen McCall’s pattern 5142. It was recommended by the instructor and readily available. I’ve also purchased the Jalie 2908 pattern which I plan on using for my next pair of jeans. The reviews on the Jalie pattern have been wonderful so I am looking forward to getting the chance to construct my second pair of jeans from that pattern.
In starting this process I have altered my pattern to hopefully fit my body proportions. I know I should make a muslin first but I have a ton of jean fabric in my stash and pretty much am using this first pair as my mock up. If they fit fine…if not…that is ok I will have at least gotten the opportunity to work on the concepts taught in the jean making class.
First up…Seams. (click on picture for a larger view)
Traditional fell seam without using a fell-foot as seen below
I used ¼” quilters tape to make sure my seams are even and straight.
Mock fell seam using my standard machine and the serger.
I’ve chosen to use the mock fell seam technique.
Up Next…Back Yoke (click on picture for a larger view)


Sewing the yoke with the standard machine then I went back and trimmed 1/8" off with the serger then pressed and topstitched.
Here are the results:
Now for the Pockets... (click on picture for a larger view)
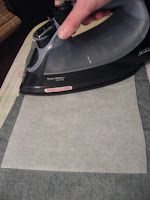
I did not cut the pockets out. I left the material uncut then traced the pocket pattern onto the jean material. I backed each pocket piece with iron-on, tear-away stabilizer. From here I designed my stitching for the back pocket and created a template to mark two of the lines to start my stitching off with and then used my 1/4" quilters tape from there to create successive stitching lines.
Stabilizer being applied. Tracing design What it looks like before sewing.
First lines of stitching. Peeling 1/4" tape off. Sewing more lines.
The final result. Notice I ran the stitching over the pocket lines. In removing the tear away stabilzer this helps maintain your stitching without putting stress on the stitching right at the pocket cutting line. Thus avoiding your stitching coming out on the pocket itself.
Remove stabilizer, cut pocket out, press for attachment to jean backs.
What the backs look like with the pockets attached.
I'm not using rivets this first time so I bar tacked at the top of the pockets.
I didn't give you a full shot view of the template before. Here it is on the pocket after stitching.
Being as I made my design symmetrical I flipped the template to draw the second line.
Stay tuned...will be doing some fly work next.


You have me wanting to make jeans now!
ReplyDeleteWow, thanks for all the detailed pictures. I never thought of using stabilizer and extending the stitches past the cutting line. Great ideas.
ReplyDelete