~ Mimi's Adventures in Crafting ~

The musings and adventures of a "forty-something" wife and mother whose inner-artisan has been reignited. Enter my realm and enjoy....


Friday, May 25, 2012

All Things Princess…

Here you will find all the posts related to the Princess Slip pattern # 0336 from the VPLL that  was sewn for the 1912 Sewing ProjectClick on the image and you will be taken to the VPLL website and pattern for the Princess Slip # 0336..  Enjoy!!!

Happy Sewing…

VPLL Review for Princess Slip # 0336

E0336_SLIPw

  1. Pattern Name:  Princess Slip # 0336
  2. Sewer’s Skill Level:  Advanced
  3. Pattern Rating:  I would rate this pattern a 4.  It was fairly easy to put together, the insertion lace and pleating are what make this project more challenging.  I enjoyed sewing it and would probably make this again in the future but with a more modern flare to it.  After seeing how my slip came out I would even consider sewing one as a wedding dress by adding a pastel colored slip under it to match the ribbon used on the slip.  I kept my version as close to the original except for alterations.
  4. What skill level would someone need to sew this pattern and why? My personal feeling as to who could sew this slip;  I feel it is intended for someone with at least some basic sewing experience under their belt.  The pattern itself is very easy to sew consisting of four main pieces and could be put together quickly without any difficulties.  Where this pattern is for the more experienced sewer is with the lace insertion techniques along with the pleating.
  5. Were the instructions easy to follow? If not, what needs to be changed?
    Honestly, I really didn’t follow the instructions but in reading the directions that came with the pattern they followed a natural progression through the making of the garment.  One step that I would change was that I found it easier to do the insertion lace on the upper side front pieces first prior to sewing the front princess seams.  Additionally, a better description on how to sew the front and back princess seams and in dealing with the points would be helpful to beginner sewers.  I mentioned this in my post Slip Basics, Insertion & Embroidery.  I also found the directions for attaching the flounce to be a bit repetitive and found it easier to attach the flounce in the manner I chose in the post Flouncing Around.  I believe stitching the flounce directly to the slip and then placing the insertion lace over the seam to be a bit bulky and a lot of extra sewing the gets taken out.  My method seemed easier.  I also preferred using 1/4” double-fold bias binding on the armhole instead of just turning the seam allowance under for it made for a cleaner finish.
  6. How was the fit/sizing?  Did it correspond to what you thought?
    The fit and sizing were ok but I adjusted for my measurements.  The pattern illustration leads you to believe that the slip is fitted at the top above the bust but I found, as with other participants, there to be excess fabric here that gets drawn up with the eyelet trim.
  7. Did you make any pattern alterations? If so, what alterations did you make? Where they fit or design alterations?
    I adjusted this pattern for my sizing increasing the bust and making other adjustments to accommodate my back.  A more detailed description of these adjustments can be found in the post Adjusting the Princess Slip for Me, Myself & I.  As with other participants that sewed this pattern, they too found that there was too much fabric around the neckline.  Of course, without any alterations to the pattern, this extra fabric would allow for a range of bust sizes to fit the pattern.  That could be the original intent of the designer being as this was published in a magazine to be utilized by the masses.  In my muslin fitting stage I also didn’t like the placement of the side seams and the shoulder seams, both being more towards the back and I adjusted the pattern to bring them back on center for the sides and forward on the shoulder.  I also created facings for the center back placket being as I did not like how the originalprincess slip-50 directions handled the closure.  A detailed description of this can be found on my post A Tale of Two Backs.  The alterations were made to make the pattern fit more comfortably for me while maintaining the original design qualities.
  8. Other notes:
    The pattern directions offer a notation to a resource for an excellent tutorial on how to make accordion pleats, while this notation is helpful it would be better to have this information placed within the slip directions being as not everyone has access to the book or can afford to buy an additional resource to complete the slip.
  9. Materials Used & Cost:
    Sometimes it is helpful to know how much someone paid to make a project in order to decide if that would make a feasible project for themselves.  For this project you could spend a considerable amount of money on the insertion lace if you wanted to stick with totally authentic materials.  I, on the other hand, tried to create a nice garment while staying within a reasonable budget.  What follows is my breakdown of materials and cost (cost includes sale prices received and sales tax).  I only priced the slip for what materials were utilized not for a whole package or yardage that was purchased.

    Size

    Description

    Use

    Yardage

    Cost

    1 1/2”

    Double Scalloped Edge Lace Insertion

    7

    $ 9.64

    3/4”

    Cluny Lace Insertion

    5 1/2

    $ 7.57

    1 1/2”

    Scallop Rose Lace Armhole Trim

    1 1/2

    $ 4.80

    5/8”

    Cluny Eyelet Trim Neckline Trim

    1 1/2

    $ 6.23

    3/8”

    Pink Satin Ribbon Insertion

    7

    $ 2.42

    1/8”

    Pink Satin Ribbon Neck/Armhole

    3

    $ 0.16

    1 1/2”

    Pink Satin Ribbon Neckline, gathered

    3

    $ 1.25

    1/4”

    Cream Satin Ribbon Neckline, Finish

    1 1/2

    $ 0.08

    1/4”

    Double-Fold Bias Binding Armhole Finish

    1 1/2

    $ 0.78

    36”

    Muslin Slip & Flounce

    7

    $  7.28

    1/2 pkg.

    Fuse N’ Tear Embroidery

    -

    $  2.18

    2

    Hook & Eye Slip Closure

    -

    $ 0.17

    10

    5/8” Buttons
    from Great-Grandma Nettie’s Button Tin
    Slip Closure

    -

    $  0.00

    -

    Beige Thread
    from personal stash

    -

    -

    $  0.00

    -

    Pink Embroidery Thread
    from personal stash

    -

    -

    $  0.00

          Total Cost:

    $ 42.56


  10. Final Thoughts:
    This was a fun project which took more time than I anticipated.  My best estimate as to time expended was approximately 44 hours over a two month time period.  Now that I have completed this project and have discovered the pitfalls that happened with me, at some point in the future, I will make this pattern again as a modern day dress or wedding gown.   It is my hope other participants in the 1912 Sewing Project will give the Princess Slip Pattern # 0336 a shot and make something wonderful from it.  There have been many beautiful projects so far…looking forward to many more.

Happy Sewing….

A Princess Revealed

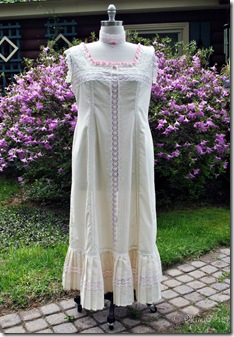
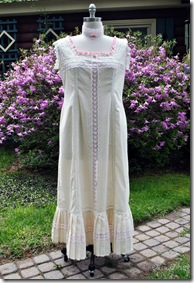
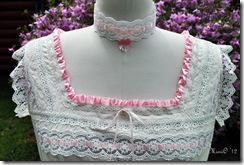
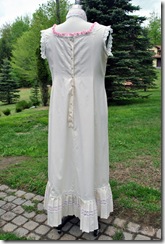
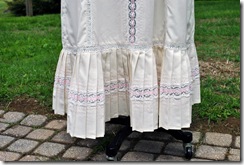
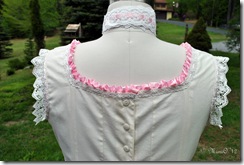
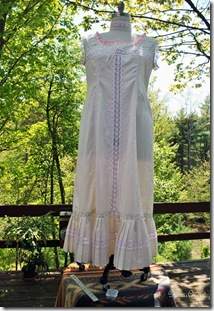
Princess Slip Front Behold, my PRINCESS SLIP revealed.  It is good to finally have this project complete and under my belt.  For all the ups and downs I do believe the slip turned out wonderfully.  You can find the Princess Slip Pattern # 0336 on the VPLL site and can join up to be a test sewer at the 1912 Sewing Project.

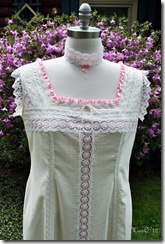
Princess Slip Front  Close-Up of Front on Princess Slip

  Back of Princess Slip Flounce of the Princess SlipUp-Close of Back of Princess Slip

Happy Sewing….

Thursday, May 24, 2012

Flouncing Around

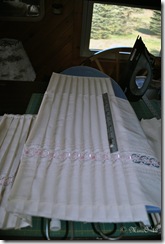
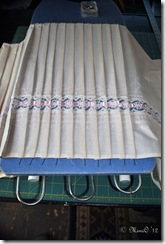
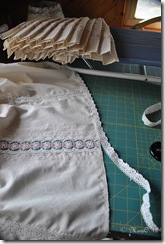
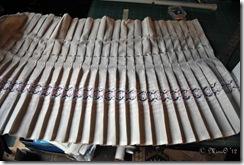
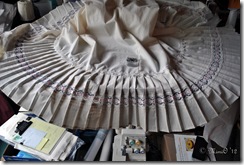
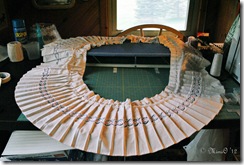
Tucking the flounce into the pleating board, pressed and cooled.I am finally getting close to having the Princess Slip # 0336 for the VPLL 1912 Sewing Project complete.  The flounce has been a major contributor to increasing the amount of time spent on this project.  Having completed my homemade pleating board I proceeded to pleat the flounce.  In the pictures below you can see that my board was wide enough to fit the width of the flounce.  Starting at one edge After removing the section from the board I pinned the section to the ironing board and repressed and cooled.of the board I careful tucked the flounce into the pleats and then pressed them down.  To aid in making sure the fabric was all the way into the pleat I used my metal ruler to slide in between and then pressed and moved the ruler down the pleat and then moved on to the next pleat.  Once that area had been pleated the fabric was removed, pinned and pressed again on the ironing board.  All pleating was allowed to cool completely before moving onto the next section of flounce.


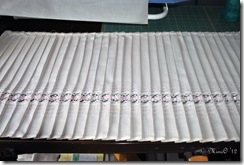
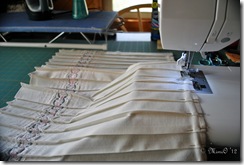
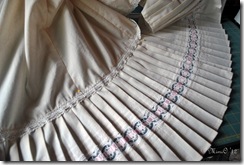
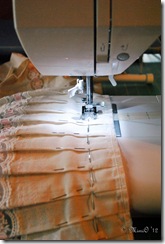
Here is the 17” wide flounce with all the pleats pressed in.   I re-stitched the flounce at the top so that the pleats would not open up while the flounce was being attached to the slip.

17" Pleated Flounce. Stitching pleats down at the top.

Pinning and stitching the 3/4Being as I really didn’t follow the directions I also veered away from that again when it came to attaching the flounce at the base of the slip.  Having previously serged all raw edges on my slip pieces the lower edge of the slip was already finished and ready for stitching on the insertion.  The 3/4” insertion was laid out on the right side of  my slip and stitched down.  The raw-finished hem was turned under and stitched as if you were following the regular insertion directions. 

Next, I used Myrna and my metal rulers to get the measurements I needed to transfer over to the flounce.  In the second picture below you can see where I ran a pinned line  to mark off where I’d need to stitch the flounce on.  I did not immediately match this up to the slip base instead I ran a line of straight stitching along the marked out pin line and then went back and serged the excess flounce fabric off.

  Myrna and the slip getting measured up for the flounce.  The measurements transferred onto the 17" flounce.  The pinned line is where the flounce will get sewn, trimmed and attached to the slip base. 

The flounce was pinned onto the base of the slip again.

Pin testing the cut-down flounce.  Pin testing the cut-down flounce.

Below is another picture showing that I further fine tuned the flounce down some more using the same process with Myrna and the rulers as before.  The measurements were once again transferred to the flounce and a line of straight stitching with serging the excess fabric off took place.

The slip need further shortening.  Pinned measurements were transferred, straight stitching and serging excess fabric off.  Straight stitcing the marked hem adjustment to the flounce.

Myrna in her final fitting.This was one of the more tedious processes with this pattern.  Extreme patience and time is required when dealing with the flounce.  The efforts are well worth all the fussiness with getting the fit for the length correct. 

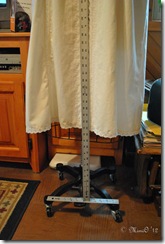
Here is the final fitting on Myrna.  It was so beautiful out that I couldn’t resist placing a blanket on our deck table and taking Myrna outside for her final fitting.  I just needed to make 1/4” adjustments in how the flounce hung prior to stitching to the base of the slip.  Once the final adjustments were complete the right side of the flounce was pinned to the lower edge of the 3/4” insertion lace and stitched down from the right side.  The raw edge of the flounce was turned back on the wrong side of the fabric and stitched. Thus finishing the slip.  

For other individuals sewing this pattern I would recommend NOT cutting your flounce out until you have completed the upper portion of the slip and measured off how wide of a flounce you will need.  I found having the flounce cut out at 17” wide to be an extreme waste of fabric.  Of course with all that excess width you can adjust your slip for the desired length but that then creates the fussy adjustments that I had to make above.   That fussiness compounded by the pleating.  Because I wanted my slip 5-6” off the ground my final finished flounce, as attached to the slip, was 10” wide.  It would have been much easier to have the flounce cut at an 11-12” width then discarding all the wasted fabric I did in adjusting the 17” flounce.

Join Myrna and myself for the final reveal in the the next post.

Happy Sewing….

Wednesday, May 23, 2012

The Flounce From Hell and Other Unmentionable Adjectives…

Being a lady of  modern times I hold no qualms in calling this portion of the 1912 sewing project on the # 0336 The flounce with the insertion lace sewn on, showing the tear-away stabilizer ironed onto the wrong side of the fabric.princess slip, The Flounce From Hell.  I use this as a term of “endearment”…NOT…for this particular stage in the process of completing my slip.
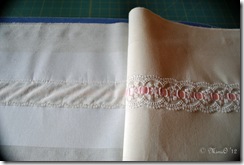
As you may recall I mentioned in a previous post that there were TWO moments in this project in which I became completely frustrated and wanted to just run to a corner and cry my eyes out.  This is the second one!!!

Things were moving in the right direction.  I cut the flounce out according to the directions, stitched one seamThe flounce with the lace inserted and the embroidery being stitched on each side of the lace. together, pressed that open and top-stitched the seams down.   I finished off the remaining raw edges with the serger.  I installed the 1 1/2” insertion lace and embroidered on both sides of the lace.  The tear-away stabilizer was removed, which took a considerable amount of time.  Not wanting to accidentally ruin the lace insertion I developed a safe method for clipping open my insertion.  Because my lace was 1 1/2” wide I could fit my flat, 12”, metal ruler in between the layers and clip the seams open without any accidental miss-clips into the lace.  If you have a narrower lace as your insertion I would
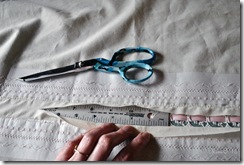
Clipping the insertion lace safely by using my metal ruler.

suggest cutting a piece of poster board an 1/8” less and approximately 12” long to slide in between the layers to protect your lace while clipping open.

Here is where things turned horribly wrong.  I spent a good portion of one afternoon (4-5 hours) pleating my flounce.  I stopped at the half-way point and compared it to my lower slip measurement and was literally crushed to find that it wouldn’t cover the slip measurement.  No matter how one figured it out I could not get 1” knife pleats into the flounce and have it match the measurement at the lower slip.  Dejected I went back to the drawing board and analyzed my options. 

First up…pressing all those pleats out and hoping they wouldn’t show too badly once the flounce was pleated again.  One just has to sit there and shake their head at such a goof!!!  Second, I hopped online and checked pleating out and discovered that I would NEVER have enough flounce for 1” knife pleats given the cutting requirements the pattern gave you; for one pleat I would need three inches of fabric in order to pleat the flounce as I’d like.  My recommendation to future participants that want to sew this slip is to make the upper portion of the slip first and once complete, measure the lower edge where your flounce will be sewn.  Once you have that figure add 3” and then multiply that figure by 3.  This should give you enough flounce for 1” knife pleats to match your lower slip edge plus a little extra to close the seam.

In trying to dig myself out of this dilemma I had considered cutting another length of flounce to add on to give me the required measurement I’d needed for 1” knife pleats but sadly I did not have enough of my insertion lace.  I finally settled on taking 1/2” pleats with a distance of one inch between the folded edge of the pleats.  Not exactly the look I wanted but it would have to suffice.

Next…I was NOT going back to sitting and pinning the pleats on my ironing board again.  Over a two hour period I created 24” wide pleating board.  Below are some pictures of the process.
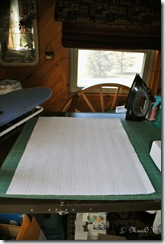
Marked interfacing/muslin piece ready to be straight stitched.      A quickie explanation.  I purchased some heavy, fusible craft interfacing meant for bags.  I marked off the lines for my pleats in pencil and then fused the fabric to some muslin.  I then stitched along my penciled lines which will help you when you go to fold your pleats.  I folded the pleats, pressed firmly and then stitched on the outside edges to keep the pleats in place.  I cut a piece of poster board the measurement of my finished pleating board.  I sprayed adhesive to one side of the board and covered that with some muslin folding the raw edges over to the wrong side.  I then sprayed the wrong side of the board and very, carefully pressed my pleated piece onto the board and smoothed it out.  Viola….instant pleating board.  It wasn’t perfect but made it a lot easier to pleat the flounce.  Added bonus…the adjectives that were flying furiously earlier were now few and far between.
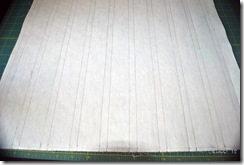
Straight stitching completed.  Folding along the stitched lines and then pressing in the fold.

With this disaster in the making diverted and my sanity restored, I commenced to pleat my flounce.  The results will be shown in my next post.

Happy Sewing….

Tuesday, May 22, 2012

Front Meets Back and Other Pretty Things…

Having survived the drama associated with my center back placket (see the Tale of Two Backs), work continued with getting the Front and Back together on my princess slip # 0336 for the 1912 sewing project.  I was looking forward to this part in the process because the results were yielding a wearable garment.

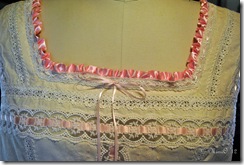
The shoulder seams were stitched and the edges on the neckline were turned under and catch-stitched down.  I used a 5/8” wide eyelet trim with 1/8'” satin ribbon woven into it.  The trim was pinned in place and machined stitched down doing the edge furthest from the neckline first.  I then worked the corners of the front and back so that the eyelet would lay properly and not catch the ribbon when the neck edge was stitched down.  Some other participants mitered their corners but I found this wasn’t necessary by pinning out the excess fabric.

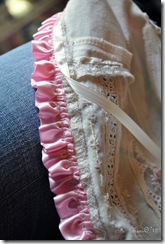
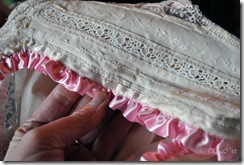
The pattern calls for placing 1 1/2” gathered lace at the neckline but I found that to be to “Fru-Fruie” for my taste and instead purchased a 1 1/2” wide satin ribbon that was folded and gathered with two rows of basting stitches.  I doubled the measurement of the neckline for the ribbon, marked the center, turned under the raw edges prior to running my basting stitches.  I matched the center of the ribbon to the center front and matched the edges to the finished placket edges and distributed the gathers evenly.  You really need to take your time during this process so you don’t accidentally break your basting.  It takes a while but is all worth the time expended in the looks of the final garment.  Here I hand stitched the ribbon to the neckline edge and then covered the raw edge with 1/4” satin ribbon which I also hand stitched down.  Below are photos of this process.

1/4" satin ribbon being stitched over the raw edge of the gathered ribbon.  All nice and tidy on the wrong side.

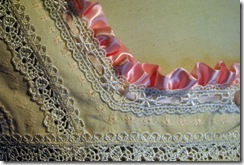
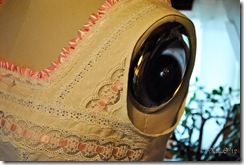
Here is the finished results at the neckline showing the gathered ribbon, eyelet trim and the added embroidery.

The finished front of the princess slip.  Up close showing the embroidery, eyelet trim and gathered ribbon.

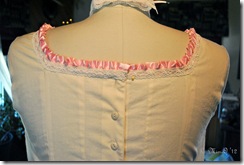
The finished back.  The final button was stitched on as well as hooks and eyes to keep the top closed. 
Just beautiful!!!
princess slip-25

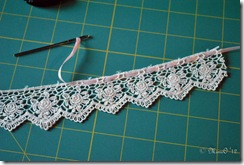
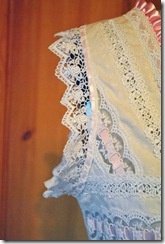
The side seams were then stitched and pressed open.  The raw edge of the armhole was finished with a 1/4” double-fold bias binding.  Here the armhole called for 1 1/2” gathered lace but I was not fond of that idea either.  I found a lovely 1 1/2'” flat, lace.  Even though the lace was not intended to have ribbon woven through it I wove the 1/8” satin ribbon through it and hand stitched it to the armhole.

Bound armhole with 1/4" double-fold bias tape.Weaving the ribbon through the 1 1/2 

Final armhole results.

princess slip-31 

Me oh my….I have a wearable garment and can see the light at the end of the tunnel on this project.

Up next….the flounce!

Happy Sewing…

Monday, May 21, 2012

A Tale of Two Backs… !#$%

While working on this project I had only TWO complete moments of frustration, this being the first.  My issue resulted from the creation of back facings and not totally paying attention to what I was doing!   As I was “merrily” moving along with my princess slip # 0336 for the 1912 sewing project I ran into a minor snag which almost made me want to run to a corner and cry.  Everything had gone so well on the front of the slip and I was progressing nicely on the back.  Following are the steps that were taken in the progression of the back along with some pictures:

Back Facings 

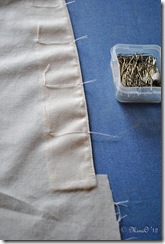
Back facing showing a serged hem. In viewing some of the completed princess slip projects on the VPLL website I concluded that I did not like how the back opening was handled and created back facings by going off the center back of the pattern and making a facing pattern.  I cut two facings and serged the upper and lower edges then serged/trimmed 1/4” off the raw edge of the hem.  This could be handled with a traditional hem treatment by turning under 1/4” and stitching the hem but I wanted less bulk.  The edge that would match up to the center back seam was left untreated being as it would be trimmed later.  With right sides together I stitched each facing to the center back pieces taking a 3/8” seam allowance along the back and neck edge.  The seam was pressed towards the facing and edge stitched from approximately 3” up from the base to as close as you can get at the top of the facing, trimmed along the center back and diagonally at the corner, turned and pressed.

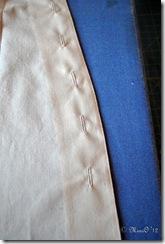
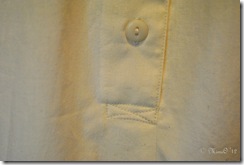
Back facing finished off, the hem was catch-stitched down and buttonholes were sewn in.

As stated previously, I did not like how the back gapped and placed darts starting at the neckline to one inch below the waistline on each center back piece.  Here is where I further tweaked the dart on each side based upon my scoliosis.  More was taken in on my left side then my right due to excess fabric associated with the scoliosis.  The hem was then catch stitched down to approximately one inch above the placket point.  The piece was pressed again and a row of topstitching was run 1/8” from the edge on both center back pieces.The left center back piece with the buttonholes.  The button holes were marked on the left center back piece.  My finished facing piece is 1 1/2” wide so I located my buttons holes 3/4” in from the edge and evenly spaced out for 10 buttons and stitched.  I applied fray check to each button hole and left that to dry prior to cutting the holes open.  I was so thrilled with how nicely everything had come out. 

Fate Rears It’s Ugly Head

Now…here is where my “mistake” with the back opening was discovered and I was crushed knowing how much time had been committed to the back.  I went to sew the center back seam on the placket and realized I hadn’t adjusted my placket on the left side.  I had cut both pieces the same and was missing the fabric necessary to close the placket properly.  Oh…how dejected I was to know I had “screwed” up and this screw up would cause me to have to wash, dry, and press additional yardage in order to cut this piece over with the corrected pattern.  Yikes…all of that nice work gone to waste!!!!  Ten o’clock in the evening is not the time to discover these little mess ups.  My goodness…I was besides myself at having done this!!!  Well…sewing is always a learning experience and I was “schooled” with this little faux pas.
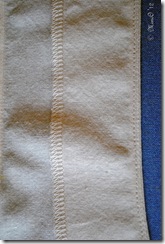
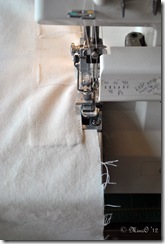
Well, needless to say I got over myself and remade the left center back piece.  Below are pictures of the remarked button holes.  The center picture I am finishing the back seam by serging the raw edge and the right is the finished seam with the tail which is then woven back in.

The "second" Left, center back piece with button hole markings.   Serging the raw edge on the center back piece.  The finished serged raw edge.

Weaving the tails back in.

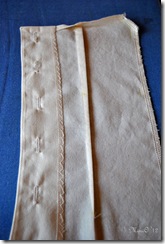
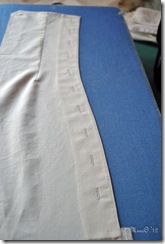
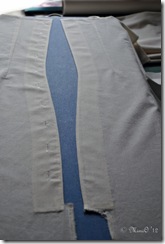
Here is the “second” left, center back piece all finished and the center back pieces side by side.  You can see at the lower placket how the left back piece was adjusted for a lapped placket.

The finished "second" left, center back piece.  princess slip-20

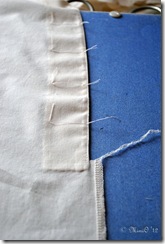
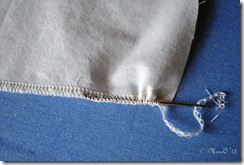
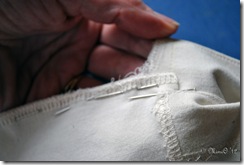
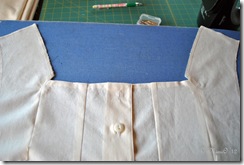
Once complete I then stitched the center back pieces together.  The center back seams were matched up and stitched until the placket point.  The left, center back piece was lapped over the right, center back piece matching up the center points on the plackets.  I pinned the placket closed to the neckline to stabilize the area and stop the pieces from shifting.  It did require a little maneuvering, some fray check and clipping but the results turned out rather nicely and I definitely liked how the center back turned out; so much better than the original directions on the pattern.  I used vintage buttons from my Great-Grandma Nettie’s button tin. I stitched the buttons on using my machine but I left off the top button knowing I’d need room for the presser foot when stitching on the eyelet trim.   The right picture shows the lower placket with the reinforcement stitching to maintain the placket closure.

Sewing the center back seam prior to lapping the placket.  Reinforcement stitching on the lower placket.

Here is the completed back with the side backs sewn on.  All is now right with the world!!!

Ta Da....the finished back!

Thus ends my “Tale of Two Backs”….

Mimi O_2

Related Posts with Thumbnails