Now that I have shamelessly drawn you in…I am working diligently to get all my Christmas sewing projects done before Christmas Eve is upon us; which is only next Thursday!!! Can you believe the holiday is almost here??? Yikes.
I just finished up another gift for my daughter. It is a gift that you can quickly put together with a small amount of materials. My daughter has a body pillow she purchased in Target last year and no longer cares for the cover she purchased with it so I decided I’d make her a new one for Christmas. Prior to heading to Joann’s I thought maybe a plaid flannel fabric…inspiration was lacking when I walked into the store.
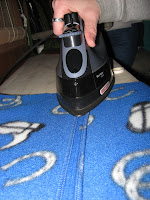
Once there I realized I picked the right day to head into Joann’s (Joann.com) for they were having their fleece on sale for $ 2.99/yard. What a bargain and I quickly went about trying to find the perfect fabric for her cover. Because she is into “Western” type gear and decorations I looked for similar designs in the fabric and quickly found the perfect fabric for her. A beautiful royal blue fleece with cowboy boots and horseshoes on it…what luck…literally…horseshoes and luck go hand in hand!!!
To make the pillow cover I purchased an 18 inch zipper, thread and 1 ¼ yds. of 56-60” wide fleece. I cut two rectangles from the fleece that were 21 inches by 55 inches; ½ inch seams are included in those figures.
• Serge one 21 inch edge on each rectangle just skimming the edge and not trimming any fabric off
• Take these serged 21 inch edges of fabric, right sides together, stitch as follows:
• ½ inch seam - start with regular stitching for 1 ½ inches, back tack and then baste where the zipper will be, then back tack at 1 ½ inches and finish with regular stitching. Adjust these measurements based upon your pillow size and zipper.
• Press open and install zipper as you usually would. I use wonder tape to baste the zipper down and then I open out the seams and sew the zipper tabs down on each side of the pressed center seam.
• I then flipped to the right side and top-stitched around the zipper at top, sides and bottom.
• Very carefully remove your basting stitches and open your zipper.
• With rights sides together, sew both long edges and finally the last short edge. I stitched with my conventional machine first and then went back and serged the edges without trimming any fabric. I just skimmed the edges once again.
• Turn right sides out and your are done and now have a wonderful Christmas Quickie pillow cover…Enjoy :-D
Happy Holidays and Happy Sewing…


No comments:
Post a Comment