~ Mimi's Adventures in Crafting ~

The musings and adventures of a "forty-something" wife and mother whose inner-artisan has been reignited. Enter my realm and enjoy....


Wednesday, December 16, 2009

Another Christmas Quickie...

Did the title peak your interest? Alas it is not what you may be thinking…

Now that I have shamelessly drawn you in…I am working diligently to get all my Christmas sewing projects done before Christmas Eve is upon us; which is only next Thursday!!! Can you believe the holiday is almost here??? Yikes.


I just finished up another gift for my daughter. It is a gift that you can quickly put together with a small amount of materials. My daughter has a body pillow she purchased in Target last year and no longer cares for the cover she purchased with it so I decided I’d make her a new one for Christmas. Prior to heading to Joann’s I thought maybe a plaid flannel fabric…inspiration was lacking when I walked into the store.

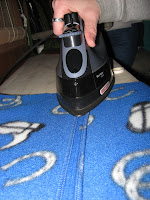
Once there I realized I picked the right day to head into Joann’s (Joann.com) for they were having their fleece on sale for $ 2.99/yard. What a bargain and I quickly went about trying to find the perfect fabric for her cover. Because she is into “Western” type gear and decorations I looked for similar designs in the fabric and quickly found the perfect fabric for her. A beautiful royal blue fleece with cowboy boots and horseshoes on it…what luck…literally…horseshoes and luck go hand in hand!!!

To make the pillow cover I purchased an 18 inch zipper, thread and 1 ¼ yds. of 56-60” wide fleece. I cut two rectangles from the fleece that were 21 inches by 55 inches; ½ inch seams are included in those figures.

• Serge one 21 inch edge on each rectangle just skimming the edge and not trimming any fabric off


• Take these serged 21 inch edges of fabric, right sides together, stitch as follows:

• ½ inch seam - start with regular stitching for 1 ½ inches, back tack and then baste where the zipper will be, then back tack at 1 ½ inches and finish with regular stitching. Adjust these measurements based upon your pillow size and zipper.

• Press open and install zipper as you usually would. I use wonder tape to baste the zipper down and then I open out the seams and sew the zipper tabs down on each side of the pressed center seam.


• I then flipped to the right side and top-stitched around the zipper at top, sides and bottom.


• Very carefully remove your basting stitches and open your zipper.

• With rights sides together, sew both long edges and finally the last short edge. I stitched with my conventional machine first and then went back and serged the edges without trimming any fabric. I just skimmed the edges once again.

• Turn right sides out and your are done and now have a wonderful Christmas Quickie pillow cover…Enjoy :-D

Happy Holidays and Happy Sewing…

Sunday, December 13, 2009

My Daughter Is Making Out Like A Bandit...


I am truly enjoying my time making gifts for the holidays. Based upon my previous posts, my daughter is making out like a bandit this week! I have just completed another gift for her for Christmas.

She has always been one who likes special pj’s for Christmas Eve so this year I thought we would continue the tradition but make her some instead. Here is the camisole and bottoms that I made for her yesterday. They came out so cute and were very easy to construct from McCall’s 5248.


Happy Holidays and Happy Sewing!!!

Review Follows for M5248:

PR: 5248

Pattern Description: Misses’ Robe, Belt, Top, Nightgown, Shorts and Pants. I made the camisole top and the full length bottoms.

Fabric Used: Cotton Flannel

Pattern Size: Y (XSml, Sml, Med) I cut a medium

Did it look like the photo/drawing on the pattern envelope once you were done sewing with it? Yes

Were the instructions easy to follow? Looked them over but really didn’t use them

What did you particularly like or dislike about the pattern? The pattern was easy to construct, no major difficulties.

Pattern alterations or any design changes you made: I made this pattern for my daughter so I adjusted it to fit for her. I corrected the bust point to go along with her measurements and made adjustments for waist and hip differences. I shortened the top 1 inch and added the same lace used at the bust area for trim around the bottom of the camisole. I finished it off with a small bow made from double-faced satin ribbon. On the pj bottoms I lengthened the pants 1 ½ inches and took 2 ½ inches off of the top of the pants due to her liking a lower rise on her pj bottoms. I changed the casing and drawstring as well. For the drawstring I stitched the center front seam and then put a buttonhole on each side of the seam line within the casing area to draw the string through. My daughter prefers to not have her bottoms fall down like they do with just a drawstring so I put 3/4 inch elastic in the casing then stitched it closed and threaded the drawstring in afterwards.

Would you sew it again? Would you recommend it to others? Yes. This is a fairly easy pattern to sew.

Conclusion: I like how these pjs came out and will more than likely make them again for my daughter as well as myself.

Friday, December 11, 2009

DD Gets Another Early Gift…


I am on a roll here!!!  With notification from my daughter that she was going to make a quick visit home for the day I quickly made up some pillows for her living room from the left over fabric from the snowman wreath I had made earlier.

A few weeks prior to this visit I was perusing the aisles in the Christmas Tree Shop when I came across some bolster pillows that had been marked down from $ 5.99 to $ 2.99. They weren’t exactly in a color I liked but figured…what the heck…you can’t buy the pillow form for that price!!! So I purchased them in the hopes of covering them.


Well…as luck would have it…the left over fabric from the wreath project was perfect to cover these pillows and the project took no time at all to complete. Following is the process I used to make the pillows:
  • measure the circumference of the pillow and added 1 ¼” for 5/8ths inch seams
    (mine were 6” + 1 ¼”, I cut two circles at 7 ¼”)
  • Measure the width of the pillow and add 1 ¼” for 5/8ths inch seams
  • Measure around the pillow and add 1 ¼” for 5/8ths inch seams
  • Cut a rectangle from these measurements.
  • To be able to remove these covers to wash I added a zipper
  • First I serged all fabric pieces before constructing the pillow cover. I did not trim off any fabric just skimmed the edges while serging
  • Taking your rectangle of fabric stitch the width ends together, starting with regular stitching and then basting where your zipper is going to be then back to regular stitching. Remember to back tack at the start and end of your basting. You now have a tube.
  • Press seam open and install zipper as usual and remove your basting stitches
  • You will need to place quarter marks on your circle. Fold your circles in half, mark on wrong side at seam line, fold again and mark
  •  Do the same for your sewn tube, these will give you reference points to match up your tube and circles evenly.
  • I stitched piping that I made from cording and 2” bias cut strips to the circle pieces and then pinned and sewed the circles to the tube.
Viola…two flannel covered bolster pillows to go and one very happy daughter!


Happy Sewing…

Wednesday, December 9, 2009

An Early Christmas Gift


Even though Christmas is right around the corner one can not help but give to others a little bit early. Of the many projects sitting in the wings to be completed I decided to help my daughter with decorating her apartment for Christmas. To greet visitors to her new pad I decided to sew up a really cute wreath that appeared in the Better Homes & Gardens Holiday Crafts magazine (You are “Snow” Welcome Wreath, photo page 58, directions page 64 – 65).


When I saw this wreath I figured it would fit perfectly in with her personality and lifestyle. I was right…she loved it and hung it up right away when she got home!!!

Enjoy the holiday season…

What We Won’t Do For Our Children…


A parents’ love is boundless and what we won’t do for our children is limitless; case in point…our 21 year old daughter and the 21’ Colorado blue spruce in our front yard. She has been, shall we say, “pestering” us to put lights on this tree at Christmas time for the past several years. We have sweetly skirted the issue but finally decided to take the hike up the ladder and hang those lights on the tree this year.


What a project this turned out to be! Two different ladders, a rigged up broomstick with a hook on the end, sixteen sets of C7 multi-colored lights and two “wild & crazy” parents swinging from the branches and we finally have a lighted Christmas tree.

This picture shows how we didn't quite get the lights right on this side of the tree at the top...but the pic is cool because I used the moon as the star for the top of the tree.

Enjoy the Holiday Season!!!


One Smart Cookie…


Today is a Snow Day and my dog, Lola, has finally figured something out.

“Mmmm….she is saying to herself…I should go outside for when I come back in my Mommy will give me a cookie for sitting nice and getting dried off."

Well…Lola has taken this to the extreme…she has been outside four times within the last hour…she is definitely “One Smart Cookie” and how can you say “NO MORE COOKIES” to a face lake that!!!


Enjoy the Snow!!!

Hurray....it's a SNOW DAY!!!


With the holidays upon us my time on the computer has diminished. I have been busy sewing and knitting but I just haven't had the time to sit down and blog about it. I’ve taken all sorts of pictures and have posts in mind but the hustle and bustle of the holiday season has slowed me down to a point where time is precious and those Christmas gifts need to be completed before any posting can be done. Oh how I want to tell you about all I’ve accomplished over the past few weeks but time is of the essence, which brings me to today's post…SNOW DAY!

Just the words alone bring back memories of sitting by the radio, listening, hoping and praying the announcer would call your schools name and say the much anticipated words…"Such & Such School is now CLOSED."

Well…today is one of those days…One can only smile in how your lifestyle can be brought to a screeching hault by a tiny, miniscule frozen item when combined with millions of other tiny, frozen flakes to give you a snow prediction of 5-9 inches. To be given the opportunity to take a breath during this busy season and take stock of what truly is important and to slow down if only for a moment is heaven.

I am taking this moment in time to just relax, have a cup of coffee and enjoy the view from my sliding glass door overlooking the deck and the forest below. Oh how I love the freshness of a new fallen snow and watching the birds come to the feeder. It is so peaceful and calming.

Life is good…Enjoy!!!

Tuesday, December 1, 2009

Mail Call…Another Sewing Goodie

Through my online web surfing I have come across another sewing blog that has peaked my interest. I stumbled upon the “Go Chanel or Go Home” blog purely by accident and am grateful for that minor “click” that led me in that direction.

I have been interested in making a “Chanel” jacket for sometime and this blog is all about creating your own jacket in combination with sharing your creation process with other fellow “sewists” as well as the internet community who share a similar love for Coco Chanel and her designs.


In wanting to create a “Chanel” jacket I needed more background information on the construction process. That is what brings me to today’s Mail Call…as I quickly rip open the large manila envelope out comes the book I’ve been anxiously awaiting to arrive from Amazon. “Great Sewn Clothes” from Threads Magazine has come home to reside with my collection of sewing books. For me…this is the start of the process in the making of my “Chanel” jacket…I will be devouring pages 8 – 13 once this post is up.

The patterns I have in mind…Vogue 8369 or Vogue 8259. Being as these are out of print patterns I will leave my options open and peruse the other pattern companies for jackets of similar construction as well as reviewing what fellow “Go Chanel or Go Home” bloggers have used.

I am open to suggestions or any ideas as to the most appropriate pattern to use for this process.  Your help would be greatly appreciated.

Wish me luck on my quest for the couture sewn jacket!

Happy Sewing…

Monday, November 16, 2009

M5142


PR: M5142

Pattern Description: Misses’ Classic Fit Jeans in two lengths with two waistband treatments

Fabric Used: Non-Stretch Cotton Denim, 12 oz.

Pattern Size: EE Cut a 20 but will need to cut smaller size next time

Did it look like the photo/drawing on the pattern envelope once you were done sewing with it? Yes but I did modify the design to fit my taste

Were the instructions easy to follow? Didn’t use them

What did you particularly like or dislike about the pattern? The pattern was easy to sew. Being a Palmer/Pletsch I figured that there would be at least an explanation of the flat back pleats in the instructions but there weren’t any. I didn’t need this information but for an inexperienced sewer who doesn’t understand fit they would require an explanation as to what to do with this fit technique.


Pattern alterations or any design changes you made: I participated in the Build A Better Jeans class and didn’t have the opportunity to buy the Jalie 2908 jean pattern that I had wanted to use for this project so had to resort to using this one being as it was readily available locally. I made several alterations to this pattern being as I didn’t like the final shape shown on the pattern envelope and technical drawings. I wanted the jeans to be more like my RTWs so I adjusted the side seam going from the hip area and tapering in at the knee by 1 ½ inches and then flaring back out at the hem. I also did the same for the inseam starting at the crotch tapering in 1 ½ inches at the knee and back out to the flared hem. I shortened the crotch front by 3/8 inch and lengthened the jeans 2 ½ inches. I added 3/8 inch to the waistband to bring it in line with the width of my RTWs. Due to the increased width in the waistband I added some length to the belt loop piece. I didn’t want my side front piece to be all denim so I changed the design cutting the piece from my lining fabric and making a denim piece to overlay half of the side front so that the lower part of the pocket was out of the lighter weight fabric and reducing some bulk in that area. I decreased the width of the ticket pocket and moved its position over a little bit towards the side seam. I moved the back pockets as well not liking where they were sitting on my form. They had them too close to the center back. As far as fitting goes, this pattern offers a generous 1 inch seam allowance but I found I needed to take an additional 1/2 inch to 1 inch more from the waist down to the knee. I did make up the pattern according to my hip size but still needed to make these additional adjustments. Being as these were my “mock-ups” I will have to redraw my pattern downsizing and adjusting it for the additional amount needed to be taken in. I also did the “Rocketboy Waistband” treatment on my jeans. An explanation of this can be found on PR under the Jeans Sew Along thread, page 31 as well as on my blog M5142: The Finishing Touches.


Would you sew it again? Would you recommend it to others? Yes but if you are looking for a tight fitting jean, this pattern isn’t it, you might want to consider the Jalie 2908 instead using stretch denim with lycra.

Conclusion: All in all I am satisfied with how my jeans turned out. I will be making another pair to try and improve the fit. I liked the fact the jeans were sewn from denim without lycra in it.

M5142: The Finishing Touch

I am in the home stretch…starting off with my belt loops I did not make them according to the pattern or with the directions that the instructor of our “Build Better Blue Jeans” course gave us. I wanted to eliminate a few layers of bulk so once again I matched up to what my RTW jeans had. I still utilized the belt loop  pattern but cut it a little longer being as I wanted to use a thicker belt for these jeans and you need to account for that. I folded and pressed wrong sides together then brought the raw edges into the fold and pressed again. I unfolded the fabric and serged the length of the loop piece ½ way between the first fold and the second fold. I then folded the raw edge in first with the serged edge over it thus making a loop of three layers. Being as my jean fabric is so dark I stitched with my conventional machine down the center of the loop to hold the layers together then topstitched the loop on each edge. Set aside.


Moving on I opted to do a “Rocketboy Waistband." You can find information on this on page 31 of the Jeans Sew Along thread on Pattern Review. I modified some of his techniques being as he utilized glue on a good portion of his band and I prefer not to. The M5142 has two band options of which I chose the one piece band in matching up to my RTW’s.

Up first the interfacing:

I used a fusible interfacing but in an unconventional way. Being as the waist seam is 1” I folded the band on the fold and pressed lightly on the fold only to fuse together. I trimmed 1” off one side then pressed remaining side down being sure not to touch the exposed fusible with the iron.


I then trimmed ¾” off the exposed fusible edge.

Fold the denim waistband, wrong sides together and press. Open back out and mark the 1” seam line on the wrong side then trim 7/8” off of the other edge. I left 1/8” for turning ease and too make sure the band gets caught when topstitched.


Turn band over so your cut edge is face up


Mark a ½” line from the fold.

Stick down the basting tape along this line, peel and stick your fashion fabric down right sides together along the basting tape line. Do 6-8” at a time then peel some more and stick down until complete. 


Flip the band over, open flat and darken your fold line with your marking pencil/pen. You will be stitching close to the fold on the side that was previously trimmed. Do not stitch on the 1” seam side of the fold. I matched the fold up with the center of my foot and offset my needle from the center position and stitched.


I removed my basting tape and pressed the fashion fabric towards the cut side of the denim. Because you stitched approximately 1/8” away from the fold you will now have a small amount of jean fabric that will be showing.


Flip your band over having fabrics laying flat. Now press your fashion fabric over your trimmed edge encasing the raw edge being careful not to press out the center fold.


You will notice my fashion fabric is over the center fold line; I trimmed it down to 5/8” and pressed it down with stitch witchery.


Take your interfacing and place inside the fold with the fusible side down against the 1” seam line. Close the band to set the interfacing in place, it will shift a small amount away from the fold. Open out again, press the fusible down. I remarked my 1” stitching line on the interfacing.


I used the rotary cutter to cut my waistband and fashion fabric out in doing so I cut them with some extra length to deal with any fitting issues. Make sure you leave an appropriate amount over-hanging each end by the zipper opening before sewing the waist seam. Stitch your waistband to the top of your jeans.


Trim and grade your seam allowances. Sew the ends of your waistband at the zipper and fly guard, trim, turn, press and then I hand stitched the waistband down.


Topstitch ¼” around the edge. My RTW’s were edge stitched but I knew I’d have issues going through the layers and opted for ¼” topstitching instead. Cut your belt loops to size, fold over edges and stitch to the jeans according to your preference. I bar tacked mine down based upon the RTW’s.


With the extra piece of fabric that was cut off my waistband when I attached it I practiced making buttonholes with my automatic buttonholer. Oh…it came beautifully(my pic is a little blurry)…but when put to test on the jeans themselves…it was a…NO GO…due to the layers of fabric and the foot getting stuck so I had to go with making a buttonhole the old fashioned way. It came out ok…not the best but it will work. Besides it is only going to get covered up by a belt anyway.


Finally…THE HEM…

 
Whooo Hooo….a completed pair of jeans that actually fit my long legs!!!


Please Note: Measurements were based upon the M5142 pattern seams and you will need to adjust those measurements according to your patterns seam allowance.

Update: 11/18/09

I've mentioned throughout my posts on these jeans that I was taking an online sewing class (Build Better Jeans) offered through Pattern Review by Shannon Gifford of Sensible Sewing.  I know I set up links on the "Mail Call" post but I don't believe I've added any other links.  Please visit these links for more information.  The class was very informative and the instructor was extremely helpful and had wonderful materials that you could print out and keep for future reference.
Related Posts with Thumbnails