~ Mimi's Adventures in Crafting ~

The musings and adventures of a "forty-something" wife and mother whose inner-artisan has been reignited. Enter my realm and enjoy....


Showing posts with label Lady Grey. Show all posts

Sunday, March 4, 2012

Lady Grey: Hooray the Finished Jacket

Lady Grey Finished....Yes!!!Well here she is…my version of the Lady Grey using Butterick B5401.  I wish my picture had turned out better…a photographer I am not!  Trying to take the picture, see how it turned out and retake it aren’t the easiest things to do with the sun in your eyes and the weather being a wee bit brisk.  On top of that, the photographer forgot to tell me to smile. ;-) All in all I do love how this jacket fits me and what a difference the tailoring made in the looks and drape of the coat.  I will most definitely take on another tailored jacket project in the future.  Below are some views of the finished jacket hanging out on Myrna.

Finished back view. Finished front view. Finished side view.

And of course, according to Gertie, we had to offer you an accessorized version as well.  Every Lady Grey needs to be adorned;  mine is with a beautiful Celtic Brooch my mother gave to me for my birthday.

Lady Grey accessorized with a beautiful Celtic Brooch.

I am totally loving the look!!!

Onward we go to our next sewing adventure…

Happy Sewing…

Thursday, March 1, 2012

Lady Grey: Final Construction-Part 1

Pocket placed on the front jacket.

Moving along to completing the outer jacket construction was the pocket placement and installation.  Due to my having adjusted the jacket for my height I also changed where the pockets would fall along the side seam.  I lowered their placement so that they would be more comfortable for me.  Once complete the jacket was then sewn at the shoulder and side seams in preparation for setting in the sleeve.  The quality of this picture isn’t the greatest but you can see some of the top stitching I have done along my seam lines as well.


Stabilizing the sleeve cap with fusible interfacing. The lower edge has been pinked.With all the lining and jacket pieces sewn together the next step in the process was tailoring the sleeves.  The sleeve cap on the jacket was stabilized  and bias cut stripes were fused onto the lower hem with fusible interfacing.  The sleeve head was installed according to my previous posting on the lining.  The sleeve was then stitched and the hem turned up and sewn in place.


The wrong side of the wool jacket sleeve showing the sleeve head sewn into it. Turned sleeve hem and stitched it to the bias cut fused interfacing.

 Shoulder pad placement and installation.Here is a picture of the shoulder pads that were sewn into my jacket.  Due to my various adjustments and the fact that I have complications due to my scoliosis I had to sew in two different thicknesses of pads to make the jacket hang correctly on me.  It is more than obvious in this picture due to using two different colored shoulder pads.  The left front required a 1” thick pad while the right needed a 1/2” pad.  It sounds strange but it works for me and allows the jacket to hang evenly while accounting for me curvature.

With this completed, the jacket and the lining were stitched together along the front edges, the lapel and upper collar areas, seams were graded, pressed and turned.  Prior to any topstitching it was necessary to now mark the placement of the opening for the bound buttonhole onto the front facing piece.  Here pins were stuck through into the facing and then I marked with chalk onto the facing.  A square piece of black organza was stitched, clipped and turned to create the hole for the back side of the bound buttonhole.  I think it turned out lovely and no frayed areas!

Pushing pins through to mark the placement for the hole in the facing for the bound buttonhole.  Marked sewing line for the facing side of the bound buttonhole.

After sewing and turning the organza to the wrong side of the facing you are left with a wonderful looking hole to complet your bound buttonhole with. Finished bound buttonhole.

Next post Part 2-Completing the remainder of the jacket.

Happy Sewing…

Mimi O

Monday, February 27, 2012

Lady Grey: Lining

Side front lining underlined with flannel.

Wanting to add some extra warmth to my jacket I underlined all of my lining pieces with a flannel fabric.  I basted the pieces by hand first then stitched 1/2” around all edges and finished the raw edges with the serger.  The lining was then constructed. 


I also modified my coat pattern to include a hidden pocket on the left front side.  I just happen to love all the pockets that are on men’s apparel and feel ladies apparel is sometimes lacking in this department.  I wanted the extra pocket for my sunglasses, cell phone, lip balm, etc.  I utilized a technique which I had discovered in Kenneth D. King’s book, “Cool Couture”, page 79 – 82.

Attaching hidden pocket to front facing and lining pieces.

The completed hidden pocket. The completed hidden pocket from the wrong side.  The pocket has been tacked to the princess seam to prevent it from drooping when items are in the pocket.

In these pictures the  pocket was stitched to the front facing as well as the front lining pieces first and then the lining and the front facing were stitched together.  In the third picture you can see the finished pocket which was tacked to the princess seam to prevent the pocket from drooping when items are in it.

For setting the sleeve cap into the jacket I once again referred to Kenneth D. King’s book, “Cool Couture”, page 114 – 115, Easing the Sleeve Cap.  I tried using hair canvas cut on the bias for the sleeve head but didn’t like the results so opted to try polar fleece instead and the results turned out well.  Gertie also referred to this technique and uploaded a video demonstrating the process on her blog.  Here are a few pictures from my installation of the sleeve head into the lining.

  Stitching the polar fleece sleeve had to the sleeve of the lining.  As you stitch the sleeve head in you stretch/pull the polar fleece and guide the sleeve. 

What the inside of the garment looks like with sleeve head attached.  The results from the right side of the sleeve lining.

I really liked how this turned out and will use this technique on future projects.  The results are amazing and don’t require the standard two rows of gathering stitches thus saving you time.

Here are several pictures of the finished jacket lining with the wrong side showing.

Back of the completed lining with the wrong side facing out.  View showing the sleeve and side front.

Front view of the finished lining.

The right side of the jacket lining.

Front view showing the lining right side out.  Back view showing the right side of the lining.

Up next…final jacket construction.

Happy Sewing…

Mimi O

Saturday, February 25, 2012

Lady Grey: Work Continues

Back stay installed onto the wrong side of the sewn back piece. After finishing off all that lovely pad stitching, work shifted to the constructi0n of the main body pieces of my jacket.  Prior to sewing the shoulder seams I stay stitched a back stay into my jacket to help maintain the shape over the upper back and shoulder area.   This piece was fairly easy to create by tracing off the upper portion of  the sewn jacket back onto my stay material and then pinking the lower edge of the stay.  It is then stay stitched to the wrong side of the jacket back along the side, arm, shoulder and neck seams.  Then with right sides together the jacket front and back were sewn at the shoulder and side seams.  So many wonderful techniques in this SAL.

Will be back tomorrow with underlining work and setting in my sleeves.

Happy Sewing…

Mimi O

Sunday, February 19, 2012

Lady Grey: Pad Stitching and Steam Pressing the Under Collar

Now that the tailoring on the front of the jacket is complete the under collar is up next.  I am truly amazed at what pad stitching can do to a flat piece of fabric.  Gertie has a wonderful tutorial on her blog if you would like a more in depth description of how to go about this technique.  The under collar with the hair canvas basted to it.  The collar has been pad stitched with 1/8" stitching nearest the neck edge with 3/8" to  1/2" pad stitching as you get to the outer edge of the collar.

Here I’ve completed the pad stitching on the collar prior to steam pressing.   You will note that I pieced my hair canvas on the under collar.  I was being frugal and didn’t want to waste so I pieced two pieces of the canvas and then cut my collar out.


I didn’t have a tailor’s ham so I improvised and rolled up my beach towel and pinned my collar around this make shift ham.  I also stuffed some rolled up washcloths under the collar to help create the shape I wanted.  As with the lapel, by setting the iron to the highest setting to produce the most amount of steam, you can steam shape into the pad stitched under collar by hovering the iron just above the piece and steam setting the shape into it.

The collar on my make shift ham. Added some rolled up washcloths to help put some shape into the collar prior to steaming.

Here you can see the results after the collar has been allowed to cool over night.

Just amazing how some simple pad stitching and steaming can put the shape in the collar. It stands up so nicely!

Next I will be adding a back stay and constructing more of the jacket.

Happy Sewing…

Mimi O

Saturday, February 18, 2012

Lady Grey: Bound Buttonhole and Pad Stitching the Lapels

Button from Great-Grandma Nettie's Tin Prior to attaching my hymo pieces to the fashion fabric I needed to make a bound buttonhole.  A daunting task for which I had no experience on!  I’m not one to run away from a technique I’ve never tried before so thought I’d give it a shot on my Lady Grey coat but first I needed a button so I turned to my Great-Grandma Nettie’s tin of old buttons and pulled out this baby.   What do you think?  Obviously it isn’t “new” for there are some marks of usage on it but I really like how it is rimmed with the brown which sets it off against my black camel hair fabric.  Now that I’ve chosen my button time to tackle that bound buttonhole.

Finished Bound Buttonhole  I followed the tutorial for bound buttonholes on Gertie’s New Blog for Better Sewing.    There are some techniques I will practice but this seemed straight forward and pretty basic so…Living on the Wild Side…I made my first bound buttonhole right on my Lady Grey jacket.  I think it came out pretty good for my first time…

Interfacing marked for buttonhole and organza square pinned to right side of fabric and butterfly squares basted together for insertion.  Backside of completed bound buttonhole.

Moving forward I have layered my hymo pieces onto the wrong side of my fashion fabric and started the basting and pad stitching.  For this I have used Gutermann’s black silk thread I picked up in Joann Fabrics.  I have actually used the whole 110 yard spool….WOW…who would have thought there was that much hand work in attaching the hymo and pad stitching the lapels and under collar.  I may have pad stitched more heavily than usual, I am truly amazed at the results.  After steaming the lapels they look great and they are maintaining their shape beautifully.  I really like the crispness that the hymo brings to my jacket front and now understand why a “custom-made, tailored item” costs so much!!!  All that work is definitely worth the effect that results from the pad stitching.

Here are pictures of my pad stitching work:Front jacket lapels with hair canvas basted to the fashion fabric with the 1/4" tape basted to the roll line.
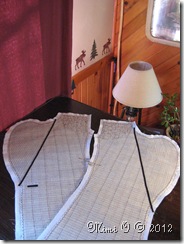
 

In these photos I basted my
1/4” tape along the roll line and
marked my stitching lines to
help guide me while pad stitching
the lapel.Marked the hair canvas for the pad stitching guidelines. You can see a more in depth
description of tailoring the
front of your jacket on Gertie’s blog 

Tailoring Jacket #1
Tailoring Jacket #2
Tailoring Jacket #3      


 Once pad stitched you can see how the fabric has adjusted with the pad stitching.

In the following photos below you can see what the pad stitching helps you accomplish.  The pad stitching has created a nice line where the collar will roll and lay back nicely.

  Preparing the lapel for steam pressing. The pad stitched lapel on the dress form.

Handy little helper...my wooden spoon!   I used the handle on my wooden spoon to aide me in my stitching where it was hard for me to get my fingers under the collar.


These photos show you how the collar lapel wants to roll back.  Setting up the lapel for steam pressing by placing rolled bath towels under the lapel prior to steaming.After completing my stitching I took and rolled up a bath towel and placed it under the lapel.  Setting your iron so that it will steam, hover the iron above the lapel and steam up and down your roll line and then outwards to the edges of the collar.  Do not press the iron onto the collar you just want to steam the collar and then allow this to dry overnight to set the collar.

The collar after steam pressing and left to cool overnight. 

   What the lapel looks like once it has been steam pressed.


Here are both lapels with the pad stitching complete after being steamed and set.

Both lapels with the pad stitching complete after being steams and set.

Up next…pad stitching and steaming the under collar.

Happy Sewing!!!

Mimi O

Related Posts with Thumbnails